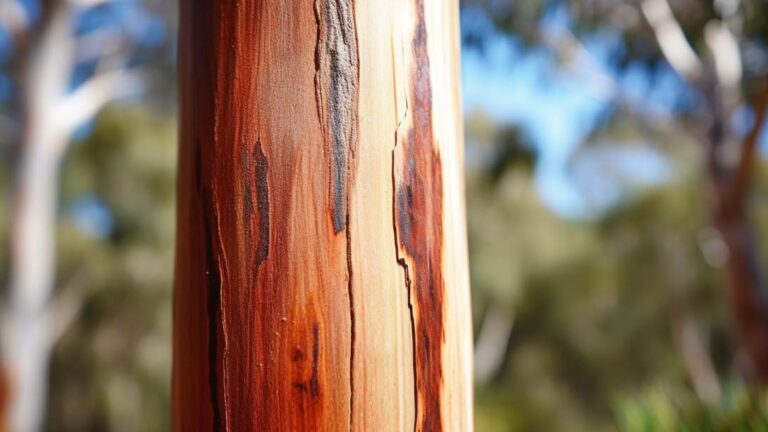
In the realm of timber care and maintenance, there exists a crucial task that often goes unnoticed, yet holds immense significance in preserving the longevity and beauty of treated wood. Sealing treated wood acts as a barrier, shielding it from the relentless assault of the elements and the wear and tear of everyday use.
Just as a knight dons armor to protect against adversaries, so too must treated wood be fortified with a sealant. This step-by-step guide aims to equip you with the knowledge and tools necessary to undertake this essential task with confidence. By following these meticulous instructions, you will learn how to prepare the wood surface, apply the sealant, and ensure sufficient drying time.
Furthermore, we will delve into the realm of regular maintenance and inspection, empowering you to maintain control over the destiny of your cherished timber treasures.
So, let us embark on this journey of preserving timber, where knowledge and technique become the ultimate weapons of protection.
Key Takeaways
- Sealing treated wood is essential for preserving its longevity and beauty.
- Sealing acts as a protective barrier against moisture, UV rays, and insect infestation.
- Regular cleaning, inspection, and resealing are recommended for long-term durability.
- Choosing the right sealant based on compatibility, UV protection, and water resistance is crucial.
Understanding the Importance of Sealing Treated Wood
The significance of sealing treated wood lies in its ability to protect and preserve the wood’s integrity, ensuring durability and longevity, thereby instilling a sense of reassurance and satisfaction in the users.
Sealing techniques play a vital role in safeguarding the wood from external factors such as moisture, UV rays, and insect infestation. By creating a barrier on the surface of the wood, sealing prevents water absorption, which can lead to warping, cracking, and rotting over time.
Additionally, sealed wood is less prone to fading and discoloration caused by prolonged exposure to the sun’s harmful rays. The benefits of sealed wood extend beyond mere protection, as it also enhances the aesthetics by providing a smooth, finished appearance.
To achieve these advantages, it is essential to gather the necessary materials and tools, ensuring a seamless sealing process.
Gather the Necessary Materials and Tools
Acquiring the essential supplies and equipment is crucial when preparing to seal wood that has been treated. To ensure a successful sealing process, it is important to choose the right sealant based on the type of wood and its specific requirements. Additionally, proper application techniques must be followed to achieve optimal results.
When gathering the necessary materials and tools, consider the following:
- Sealant: Select a high-quality sealant that is specifically designed for treated wood.
- Brushes or applicators: Use brushes or applicators that are suitable for the type of sealant being used.
- Safety equipment: Wear protective gear such as gloves, goggles, and a mask to prevent any potential health hazards.
- Cleaning supplies: Prepare cleaning materials like soap, water, and a scrub brush to clean the wood surface before sealing.
- Sandpaper: Have sandpaper available to smooth out any rough areas on the wood surface.
Once these materials and tools are obtained, the next step is to prepare the wood surface for sealing by following the appropriate procedures.
Prepare the Wood Surface for Sealing
Prepare the wooden surface for sealing by properly prepping it to ensure optimal results.
To begin, sanding techniques are essential to achieve a smooth and even surface. Use a medium-grit sandpaper to remove any rough spots or imperfections. Sand in the direction of the wood grain to prevent damage.
After sanding, thoroughly clean the surface to remove any dust, dirt, or debris. This can be done using a mild detergent and water solution, along with a scrub brush or sponge. Rinse the wood surface with clean water and allow it to dry completely before proceeding.
By sanding and cleaning the wood surface, you create a clean and receptive base for the sealant to adhere to.
With the wood prepped and ready, the next section will cover how to apply the sealant to the treated wood, ensuring long-lasting protection and beauty.
Ready to protect your timber and ensure its longevity? Dive into our comprehensive guide to timber care and maintenance. Get Started!
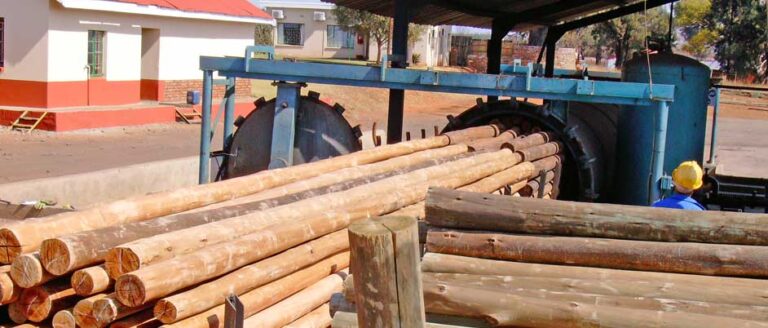
Apply the Sealant to the Treated Wood
Applying the sealant to the treated wood is a crucial step in protecting and enhancing its longevity and appearance. To ensure the best results, it is important to choose the right sealant for the specific type of treated wood.
Here are three key considerations when choosing a sealant:
- Compatibility: The sealant should be compatible with the type of treatment that has been applied to the wood. For example, if the wood has been pressure-treated with chemicals, a sealant that is specifically designed for pressure-treated wood should be used.
- UV Protection: Look for a sealant that offers UV protection. This will help to prevent the wood from fading or becoming discolored over time due to exposure to sunlight.
- Water Resistance: Opt for a sealant that provides strong water resistance. This will help to prevent moisture from penetrating the wood, which can lead to warping, cracking, and other forms of damage.
By applying the right sealant, you can ensure that the treated wood remains protected and maintains its appearance for years to come.
Allow sufficient drying time for the sealant to fully cure before proceeding with the next steps in the timber care and maintenance process.
Allow Sufficient Drying Time
After the sealant has been applied, it is crucial to allow for sufficient drying time before proceeding with the next stage of the process.
The drying process can vary depending on the type of sealant used and environmental conditions, such as temperature and humidity. Generally, it is recommended to wait at least 24 to 48 hours for the sealant to fully dry and cure.
During this time, it is important to avoid any contact or exposure to moisture, as it can interfere with the drying process and compromise the effectiveness of the sealant. Additionally, it is essential to follow the manufacturer’s instructions regarding drying time for the specific sealant being used.
By allowing sufficient drying time, one can ensure that the sealant forms a strong and durable protective barrier on the treated wood, avoiding common mistakes that may lead to premature deterioration or damage.
Moving on to regular maintenance and inspection, it is important to establish a routine to keep the treated wood in optimal condition.
Regular Maintenance and Inspection
Regular maintenance and inspection of the treated wood is essential to ensure its long-term durability and effectiveness as a protective barrier. By regularly inspecting the wood, any signs of damage or deterioration can be identified early on and appropriate measures can be taken to prevent further damage. Regular maintenance includes cleaning the wood surface to remove dirt, debris, and mildew, as well as checking for any cracks, splits, or warping. Additionally, it is important to inspect the sealant or protective coating to ensure it is still intact and providing adequate protection. To make the maintenance process more enjoyable and relatable, a table can be used to outline the recommended frequency of different maintenance tasks, such as cleaning, inspection, and resealing. This table can serve as a helpful guide for individuals who desire control over the care and maintenance of their treated wood.
| Maintenance Task | Recommended Frequency |
|---|---|
| Cleaning | Twice a year |
| Inspection | Annually |
| Resealing | Every 2-3 years |
By following a regular maintenance routine and conducting thorough inspections, individuals can ensure that their treated wood remains in optimal condition, prolonging its lifespan and preserving its protective properties.